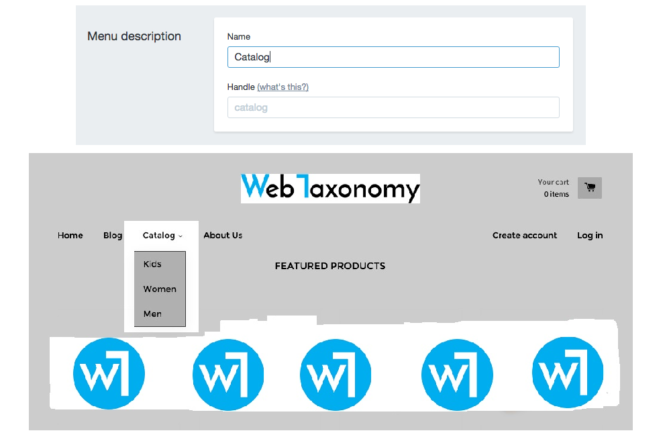
Drop Down menu in Shopify
Customers navigate your online store using the links on pages and in menus.
Make it easier for your customers to explore your store by customizing the menus and links that appear in your store’s header, footer, or sidebar.
The easiest way to add a new menu to your online store is by adding a drop-down menu to one of the links in the main menu. You can group products, collections, or pages together to make it easier for customers to navigate your online store.
A drop-down menu displays a list of links when a customer hovers their mouse over it. On mobile devices, the drop-down menu opens when tapped to display the menu items. You can make drop-down menus on your online store from any link in the Main menu:
Before you add a menu, choose an existing link in the Main menu to drop-down from, or add a new link to the main menu to use as the name for the new drop-down menu.
To create a drop-down menu
a> From your Shopify admin, click Online Store, and then click Navigation.
b> Click Add menu.
c> Enter the Name for your drop-down menu. Make sure the name you enter is exactly the same as the name of a link in the Main menu. This link will become the name of the new drop-down menu.
d> Add links to include in the new drop-down menu. Click Add menu item to add a link, enter the name of the link, and choose a destination.
e> Click Save menu.
You can find the new drop-down menu on the Navigation page of your Shopify admin. You should have a new menu with the same name as one of the Main menu links.
You can view your online store to see how your menu will appear to customers. Reload your browser to view saved changes. With your mouse, hover over the menu name to view the drop-down menu:


2 Comments
Great Share!
i am new in shopify. This Information helps me a lot.Thanks buddy. You are doing a great job.